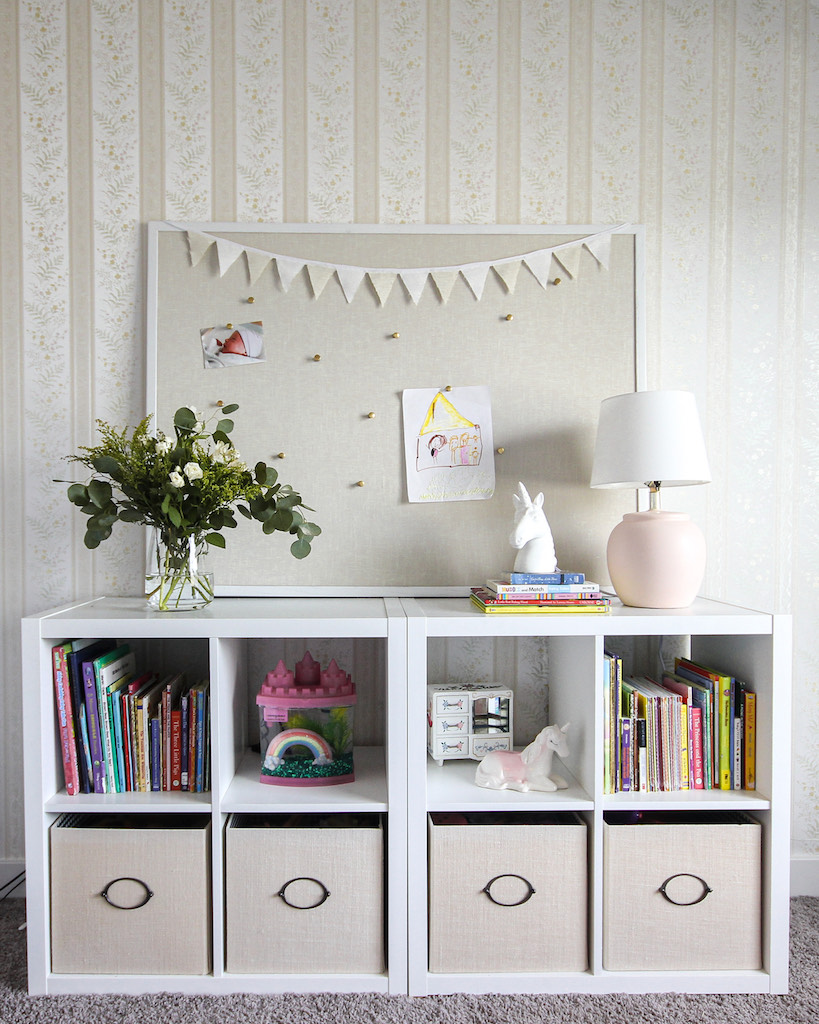
This week did not go as planned but in the words of Ross on the classic show “Friends”… sometimes we have to “PIVOT!”.

It started off with this headboard and sanding. Everything ended up being real wood except for the back part. So I decided to take apart the entire thing and use real wood so that I could stain the piece instead of paint. It is becoming more work than I intended but that is DIY for ya.

So I decided to “pivot” and work on this bulletin board. I have had it for over a year and got it off facebook marketplace for $10.

I love this pin-board from Pottery Barn. Julia Markham just used it in her kids home office remodel and it looks so cute. But I can’t do $200 for a pin-board. My husband would literally freak. So I dusted off my crafty side, made it myself and couldn’t be happier!
DIY LINEN PINBOARD
Step 1: Gather your supplies.
What you will need:
- bulletin board or pin-board
- linen fabric (ironed or steamed)
- spray adhesive
- staple gun with 5/16″ staples
- scissors
- sander
- paint
- mallet or hammer
Step 2: Carefully take apart the board.
I used a mallet and a hammer with a sick around it to minimize damage to wood. My board is also a huge 3 foot by 4 foot board so it was nailed in there real good.
Step 3: Adhere the fabric to the cork.
I ended up ironing my linen before to get the wrinkles out. Lay out your board on the floor and in small sections slowly spray the adhesive and smooth the linen onto the front until the board is completely covered. If you skip this step the fabric will not stay put. The adhesive spray is important.
Step 4: Wrap and staple the fabric to the back of cork board.
I started in the middle of the two longer sides, pulled it taught and stapled a couple. Then I went to the other side of the board and stapled those. I flipped it and did the same thing to the shorter ends until everything was tight and stapled except for the corners.

For the corners you want to keep them as thin as possible so you can get your frame back on. Start by pulling the fabric at the center really tight and down a few inches. Staple.
Then take one side at a time and create a very tiny pleat on each side and staple those.


Cut away excess fabric.

Step 5: Lightly sand frame and paint desired color.
I was lucky and had a real wood frame. So I sanded it down and painted it with white spray paint. The wood grain comes through a little bit but I actually kinda like that. But if you don’t try a chalk paint or something a little thicker it would cover that wood grain better.

Step 6: Assemble board back together.
I had to kind of slide mine into the frame then using the mallet wack it back into place. Again, mine is huge.
If you really want to get the modern campaign look you can add those metal corners and you can get them at most home improvement stores or paint your own. I didn’t want that modern for my daughters room so I opted out on that detail.

Week 3 didn’t necessarily go as planned but it ended up being okay in the end. I just had to shift my focus a little bit. Have a great weekend!


 So I’
So I’


Leave a Reply